Anyway! This small case was originally created for a friend who wanted something to put her Jaw Bone blue tooth ear piece in, inside her purse. I got the measurements of the Jaw Bone online and she told me it didn't really need to be any bigger than a business card. That is easy! So I set out and came up with this!

The strap on this can be made any length you want it, or not added at all. For the strap, I just create my own using the good ole' make your own bias tape move. Very handy and easy!
Best part about this case is the amount of fabric you need for it (without strap)- two pieces of cotton fabric cut 5 1/2 in by 7 in and also a piece of cotton batting or fusible fleece the same size.That is it. Really. I am sure you have scraps that big that you can make this out of, I know I do! To close it, you can use velcro, a snap, or a button and loop closure. I have always used a snap, myself. But that is mainly because it's a small case and a small snap with a decorative button just looks cute.
Here is the pattern for the case. Excuse my not so straight lines :)

After I have cut the pieces of fabric and batting (or fusible fleece), I pin them together in this order: batting, exterior fabric right side facing up and then interior fabric face down so the right sides of your fabric are together.

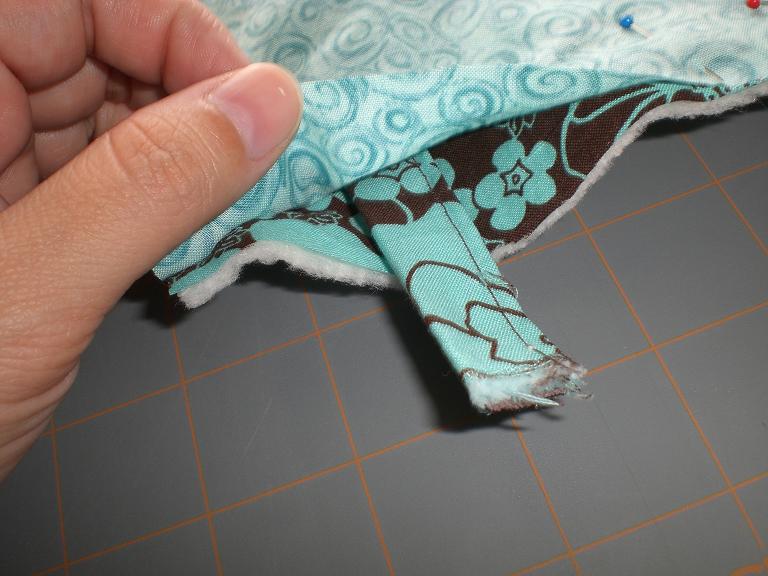
Next I stitch around the outside edges at about 1/4 in, leave a 2-3 inch opening in the bottom straight edge that I use to turn right side out. Then I turn the piece right side out and make sure the edges are all crisp. Iron and pin the bottom opening. Top stitch the opening.

Once you have your opening sewn shut, fold the bottom half up to your desired length, I use a business card and fold it to fit. Pin the edges together and top stitch around the entire piece. Once you have done that you can attach your enclosure of choice and iron the flap down to make a nice crease.


And finally, sew on your snap (or closure of your choice) and add any decorative touches you want. And you now have your finished product!!


**If you choose to include a strap, it's easiest to make the strap and attach it before you turn the entire case right side out. I generally double or triple stitch over the strap to ensure it will hold up to wear and tear.

This is sooo cute! I just made a bag for a coworker with this same fabric so you know I've got to do this with the left overs! Thanks and have a great day!
ReplyDeletegalew417@comcast.net
Thanks Gale! I just loved the colors in these fabrics, I bet a bag would be fabulous with it!
ReplyDeleteSo cute! I'm going to have to add this to my to do list. I love the fabric pattern & colors.
ReplyDeleteThanks, Bree :) I hope you get the chance to try this soon, it's just such an easy, fun project!
ReplyDelete